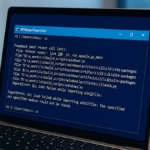
If Windows 11 setup can’t find your SSD or shows the message “We couldn’t find any drives,” don’t worry — it’s a common issue caused by missing storage drivers or incorrect BIOS settings. Follow this guide to detect your SSD, load the right drivers, and finish the installation successfully.
1. Check SSD Connections (External or Internal)
Before changing any BIOS or software settings, make sure the SSD is properly connected.
- For external SSDs: Unplug the drive, clean the USB port, and reconnect it securely. Try another port if needed.
- For internal SSDs: If you’re confident, open the back panel and reseat the drive carefully. For laptops, skip this if you’re not experienced — move to the next fix instead.
If the BIOS doesn’t detect the SSD after checking connections, the issue might be hardware-related.
2. Verify SSD Detection in BIOS
Restart your computer and press Del, F2, or Esc (depending on brand) to open BIOS/UEFI Setup.
- Go to Storage Configuration, Boot Information, or NVMe Information.
- Check if your SSD is listed there.
- If it doesn’t appear, recheck your physical connections or update the BIOS as explained later.
3. Change SATA / RST Mode to AHCI
Windows setup often fails when BIOS storage mode is set to RAID, RST, or VMD.
Switching to AHCI mode usually fixes this instantly.
- Open BIOS Setup.
- Navigate to Advanced → Storage Configuration.
- Locate SATA Mode or VMD Controller and set it to AHCI.
- Save changes and reboot.
Now relaunch Windows Setup — your SSD should appear without extra drivers.
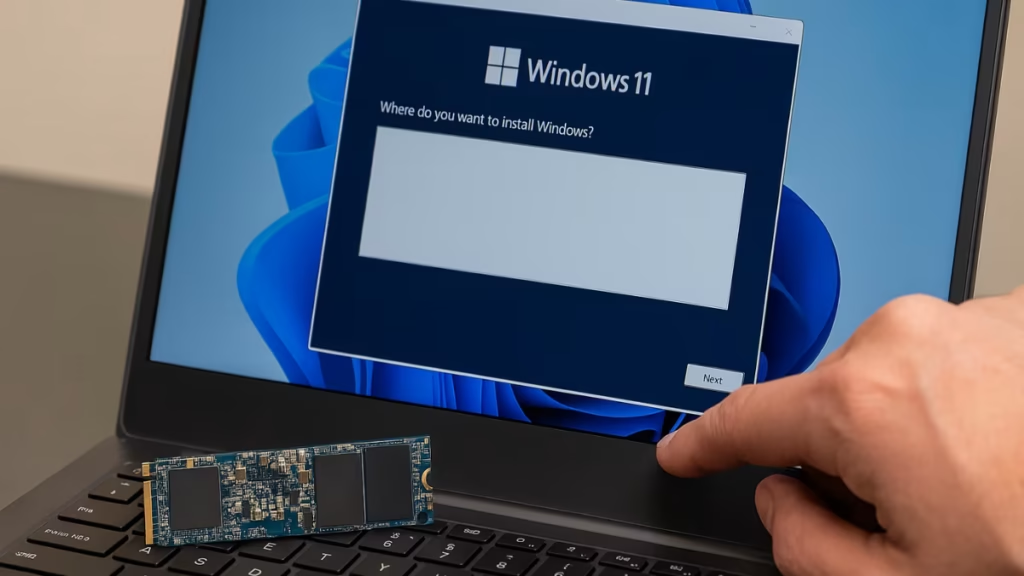
4. Load the Right Storage Driver During Setup
If your SSD still isn’t visible at the “Where do you want to install Windows?” screen, you need to manually load the correct driver.
Steps:
- On another PC, go to your motherboard or laptop manufacturer’s support page.
- Download the Intel RST or VMD driver (for Intel systems) or NVMe/SATA controller driver (for AMD or others).
- Extract the driver files — you should get
.infand.sysfiles. - Copy them to a USB drive.
- During Windows Setup, click Load driver → Browse, then select the folder.
- Once loaded, the SSD should instantly appear for installation.
5. Update BIOS and SSD Firmware
If the drive appears in BIOS but not in the Windows installer, update both the BIOS and SSD firmware.
- Update BIOS:
- Download the latest version from your motherboard or laptop’s official support site. Follow on-screen instructions carefully.
- Update SSD firmware:
- Use the manufacturer’s utility tool (if available) on another PC to check for updates.
Both updates can fix storage detection bugs in older firmware builds.
6. Check Boot Mode and Secure Boot
Windows 11 requires UEFI mode and often Secure Boot for installation.
- In BIOS, confirm Boot Mode = UEFI.
- Disable CSM (Compatibility Support Module) if enabled.
- Enable Secure Boot (you can disable temporarily if causing issues).
- Save and reboot before retrying the installation.
7. Clean the SSD and Recreate Partitions
If the installer sees your SSD but refuses to install, you may have partition issues.
Use DiskPart to clean and reformat it:
- On the “Install now” screen, press Shift + F10 to open Command Prompt.
- Type:
diskpart
list disk
select disk 0
clean
exit- Close the window and click Refresh.
The SSD will now appear as unallocated space.
8. Convert the SSD from MBR to GPT Format (If Needed)
Windows 11 works best with GPT-formatted disks under UEFI mode.
If your SSD is still using the older MBR format, convert it as follows:
- Press Shift + F10 during setup to open Command Prompt.
- Type:
diskpart
list disk
select disk 0
clean
convert gpt
exit- Refresh the installation window — the SSD will now be GPT-formatted and ready for Windows 11.
9. Optional: Update SSD Driver via Device Manager (If Booting from Windows)
If you can still boot into Windows but plan a reinstall, try updating the disk driver first.
- Press Windows + X → Device Manager.
- Expand Disk drives → right-click your SSD → Update driver.
- Choose Search automatically for drivers.
- Reboot and retry the Windows 11 installation.
This helps resolve pre-install driver mismatches without needing the “Load driver” option later.
10. Recreate the Installation Media
If all BIOS and driver steps are correct but installation still fails, recreate your Windows USB installer.
- Use Microsoft’s Media Creation Tool or Rufus (set to UEFI/GPT).
- Avoid legacy or MBR-only boot media — they cause compatibility issues on modern SSDs.
11. Replace or Test the SSD as Last Resort
If your SSD remains undetectable:
- Connect it to another computer to verify if it’s accessible.
- If it’s not recognized elsewhere or fails a health check, the SSD itself may be faulty.
- Replace it with a new drive before retrying installation.
If your BIOS can see the SSD but Windows 11 Setup can’t, the issue is almost always a missing storage driver or incorrect SATA mode. Once the correct driver is loaded — or AHCI mode is enabled — Windows 11 will recognize your SSD instantly.
![How to Downgrade from Windows 10 to Windows 7 [Complete Step-by-Step Guide]](https://winfix.fdaytalk.com/wp-content/uploads/2025/10/frf45-2025-10-08T134945.865-150x150.avif)