If your Windows 11 PC keeps switching audio outputs on its own — jumping from your headset to speakers or from Bluetooth to HDMI — you’re not alone. It’s a surprisingly common annoyance that can interrupt work, music, or gaming sessions.
Why Windows 11 Keeps Switching Audio Output
Windows 11 automatically tries to route sound to whatever device it thinks is active. That means if you plug in a new cable, turn on a Bluetooth headset, or your monitor sends an HDMI signal, the system may assume it’s your preferred audio device.
However, bugs, driver conflicts, or incorrect default settings can also cause it to switch randomly — even when nothing has changed.
Common causes include:
- Outdated or corrupted audio drivers
- Conflicting devices (like HDMI and Realtek Audio both enabled)
- “Exclusive mode” apps taking control of the audio device
- Windows updates resetting default preferences
- Bluetooth or USB devices briefly disconnecting and reconnecting
Quick Checks Before You Begin
Before jumping into the advanced fixes, try these simple checks:
- Make sure your audio device is compatible with your PC.
- Close any unnecessary apps using sound.
- Verify your default playback device in Settings → System → Sound.
- For Bluetooth headphones, ensure they are fully charged and not in power-saving mode.
- Test your microphone to confirm it’s working.
- Try connecting another output device to rule out hardware faults.
- If the issue started after a Windows update, uninstall recent updates temporarily to test.
Step-by-Step Fix: Keep Windows 11 from Changing Audio Output
Let’s go through the most effective methods, from quick settings to deeper system fixes.
1. Set the Default Audio Device Manually
The simplest fix is to lock in your preferred output device.
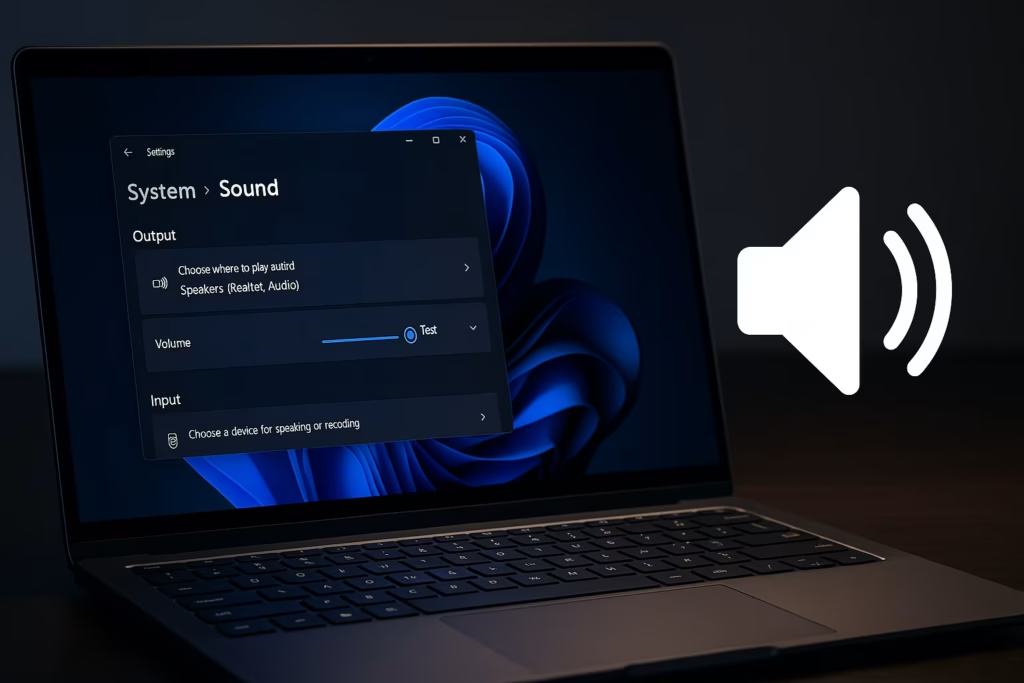
- Go to Settings → System → Sound.
- Under Output, select your main device (e.g., “Speakers – Realtek Audio”).
- Scroll down and click “All sound devices.”
- Choose your device, then click “Set as Default for Audio.”
This tells Windows to always use that device unless you change it yourself.
2. Disable Unused Playback Devices
Windows sometimes gets confused by extra outputs, such as HDMI audio or virtual sound devices. Disable the ones you don’t use.
- Press Win + R, type
mmsys.cpl, and press Enter. - In the Playback tab, right-click on devices you don’t need → Disable.
- Keep only your main speakers or headset enabled.
By removing unused outputs, Windows won’t accidentally route sound elsewhere.
3. Update Audio Drivers
If your system keeps switching outputs, you may be using outdated drivers.
- Right-click the Start menu → Device Manager.
- Expand Sound, video and game controllers.
- Right-click your main audio driver (e.g., Realtek, Intel, or Bluetooth) → Update driver.
- Choose Search automatically for drivers.
- Restart your PC after completion.
If the problem persists, continue with a full driver reinstall.
4. Reinstall Audio Drivers
A clean reinstall often helps when driver conflicts cause instability.
- In Device Manager, right-click your audio device → Uninstall device.
- Confirm the uninstallation.
- Restart your PC — Windows will reinstall the driver automatically.
- Alternatively, download the latest version directly from your motherboard or laptop manufacturer.
5. Restart Windows Audio Services
Restarting core audio services resets how Windows manages sound devices.
- Press Win + R, type
services.msc, and hit Enter. - Find and restart these two services:
- Windows Audio
- Windows Audio Endpoint Builder
- Right-click each → Restart.
- Set their Startup type to Automatic if it’s not already.
6. Turn Off “Exclusive Mode” Access
Some apps (like Discord or Zoom) take exclusive control of your sound device, forcing Windows to switch outputs.
- Press Win + R, type
mmsys.cpl, and hit Enter. - In Playback, right-click your active device → Properties.
- Under the Advanced tab, uncheck:
- “Allow applications to take exclusive control of this device.”
- “Give exclusive mode applications priority.”
- Click Apply → OK.
This ensures apps can’t override your output preferences.
7. Run the Windows Audio Troubleshooter
If your sound keeps flipping between devices, let Windows scan for problems.
- Open Settings → System → Troubleshoot → Other troubleshooters.
- Locate Playing Audio → click Run.
- Apply the recommended fixes and restart your PC.
8. Scan for Viruses or Malware
Sometimes background processes or malware interfere with system services, including audio switching.
- Open Windows Security → Virus & threat protection.
- Click Quick scan.
- If no threats are found, choose Scan options → Full scan → Scan now.
- Wait for the process to finish and restart your PC.
This ensures malicious apps aren’t hijacking your audio device management.
9. Disable Auto-Switching for Bluetooth Devices
Bluetooth devices can auto-connect and trigger output switching.
To prevent that:
- Disconnect your Bluetooth headset from Settings → Bluetooth & devices.
- Reconnect it and disable any “auto-connect” or “hands-free” options in the manufacturer’s app.
- When not in use, keep the headset powered off.
10. Update Windows and Firmware
Make sure your system has the latest updates and bug fixes.
- Go to Settings → Windows Update → Check for updates.
- Install any pending patches or optional driver updates.
- If available, update your BIOS/UEFI firmware.
11. Clean Boot to Check for App Conflicts
Third-party apps (like sound enhancers or gaming utilities) may override system audio settings.
To test:
- Press Win + R, type
msconfig, press Enter. - In the Services tab → check Hide all Microsoft services → click Disable all.
- Go to Startup → Open Task Manager → disable all startup items.
- Restart your PC.
If audio output now stays consistent, re-enable apps one by one to identify the cause.
12. Reset Audio Settings or Reinstall Windows
If all else fails, resetting Windows’ sound configuration can fix stubborn issues.
- Go to Settings → System → Sound → Volume mixer → click Reset sound devices and volumes for all apps.
- If that fails, proceed to Settings → System → Recovery → Reset this PC.
- Choose between:
- Keep my files (recommended first)
- Remove everything (for a clean reinstall)
- Then pick:
- Cloud download (fresh copy from Microsoft)
- Local reinstall (uses your current files)
This reinstalls Windows audio components from scratch.
See also: How to Downgrade from Windows 10 to Windows 7 [Complete Step-by-Step Guide]
Random audio switching in Windows 11 usually comes down to drivers, Bluetooth interference, or too many enabled devices. Setting a single default, disabling extras, and keeping drivers and updates current will fix it for most users.
If you’re a gamer or creator, locking in your preferred sound device ensures nothing interrupts your experience again.